Step-by-Step Guide: Setting Up Satellite SOS on Your Google Pixel 9
We now communicate and engage with the outside world differently thanks to smartphones. This is a limited-time experience that requires a steady wireless network connection. One major problem with smartphones when traveling is the dead zone. Cellular coverage is spotty or nonexistent in some places. Traditional cellular towers find it difficult to cover the many dead zones, however there is a way around this. Use Satellite SOS on a Google Pixel 9 series phone to fill in the gaps when cellular coverage is lost during an emergency.
Note:
In the US market, the Google Pixel 9 series phones come equipped with the Satellite SOS capability. Later on, it might be available on further Android and Pixel phones. For the first two years, the Satellite SOS service is free; however, after that, you might need to pay for a membership. Google Messages needs to be your primary messaging app in order for the feature to function.
How to try a live demo of the Satellite SOS feature
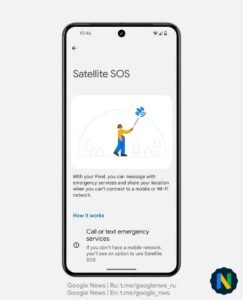
Until you require the Satellite SOS capability, not much can be seen about it. It only appears when you are not connected to Wi-Fi or have cellular service. If you need to use the function, you can examine how it appears beforehand so you know what to anticipate.
Use Satellite SOS on a Google Pixel 9 series phone to fill in the gaps when cellular coverage is lost during an emergency.
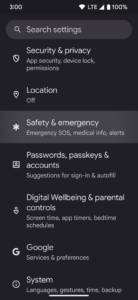
- Take a look at the Settings app on your Pixel 9.
- Navigate to Satellite SOS under Safety & Emergency.
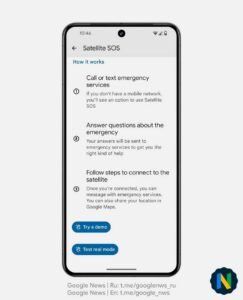
- Click on “Try a demo.”
- You can locate a satellite by pointing your phone at the sky, as demonstrated in the video.
Source: Google News
How to use the Satellite SOS function in an emergency
You will have Satellite SOS on your Google Pixel 9 series only when you’ve lost all Wi-Fi and cellular services. That is where you can use the Satellite SOS if you fit in these conditions. In an emergency, you are allowed to dial 911 as usual, and your phone instantly detects that you have lost all wireless access. It will show you an SOS button to help you get service so you can call 911. Further from there, it gives you a form with your details of the emergency so that the first responders are aware of your situation.
Next, just like you did in the demo, point your phone at a satellite and connect it by following the on-screen instructions. Your answers to the questionnaire and emergency information are transmitted by satellite to the emergency services when you are connected. The emergency services will assess your case and promptly send you a text message confirmation and answer.
To ensure everyone’s safety, the Satellite SOS feature is crucial. It’s quite helpful if you travel to areas where you know there won’t be much cellular coverage, like extended hiking expeditions.
Turn on the Emergency SOS feature for extra assurance
When necessary, Satellite SOS can be utilized alone, but for further safety measures, think about activating the Emergency SOS option. This lets you call 911 emergency services and your emergency contacts when you’re in trouble by just pressing a button on your phone. When you combine Emergency SOS and Satellite SOS, you have the greatest safety alternatives to be ready for any threat. You can use only the features you desire and tailor the experience to your needs. This section is not required.
Select an emergency number and begin the setup process.
Go in using your Google account, then follow the on-screen prompts to set up your safety information. When you enable Emergency SOS, you’ll be prompted to dial an emergency number, like 911. You can then explore more features and settings to design your own unique experience.
Follow these steps to begin using the default emergency number:
- Get your Pixel phone’s Settings app open.
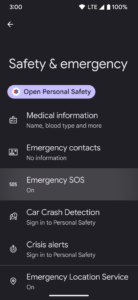
- Navigate to Emergency SOS under Safety & Emergency.
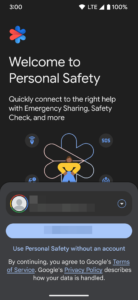
- If necessary, tap Continue to log in to the Personal Safety feature using your main Google account.
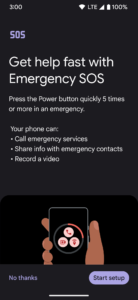
- To get started, tap Start Setup.
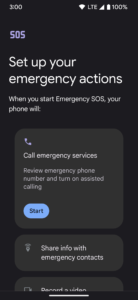
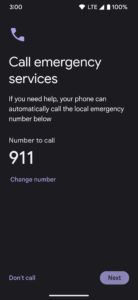
- In the Call Emergency Services section, press the Start button.
- Select a different number by tapping Change number, or leave the number to call the standard 911 number. If you do not want the Emergency SOS feature to call an emergency number, select Don’t Call in the lower-left corner.
- To proceed, tap Next.
Add more location features and your emergency contacts.
You need to add your emergency contacts after choosing your default Emergency SOS number and logging in with your Google account. From there, you may improve your experience by adding optional SMS and location-sharing options.
Follow these steps to finish the setup process and add your emergency contacts:
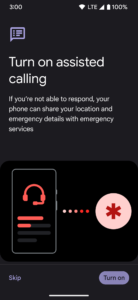
- To activate the assisted calling feature, tap Turn on. In order to proceed with the setup without aided calling, you may alternatively select Skip in the lower-left corner.
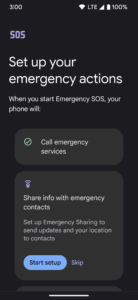
- In the section labeled “Share info with emergency contacts,” select “Start setup.” If you want to go without this functionality, you can also tap Skip.
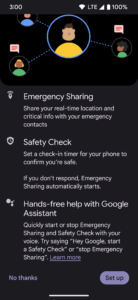
- Check out the Prepare for an Emergency page to learn how to use this tool.
- When you’re prepared to proceed, tap Set up.
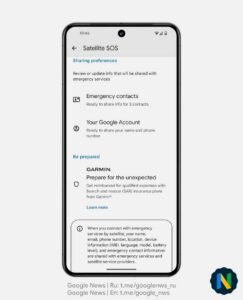
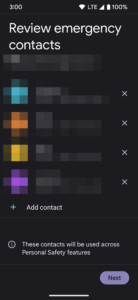
- To add your primary emergency contacts, tap Add contact. When you utilize your phone’s Emergency SOS or other Personal Safety capabilities, your contacts are alerted right away.
- Press Next.
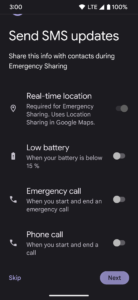
- Navigate through the options on the Send SMS updates tab, then hit the button to the right of an entry to activate it. By default, real-time location is enabled; however, to proceed without additional SMS settings, simply touch Skip or Next.
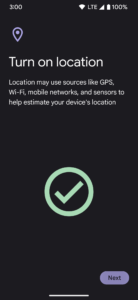
- You’re prompted to activate the location feature on your phone if it’s off. To proceed with the setup without enabling location tracking, select Skip from the menu in the lower-left corner.
- To proceed, tap Next.
- Examine the How location sharing functions page, then click OK. If you would rather not use the location-sharing option for your emergency contacts, you may alternatively choose No Thanks to proceed.
RELATED: Google Pixel 9 Review
Complete the setup by checking the last few options.
Now that we have cleared all of that, it’s time to complete the setup and look at the video recording options. Additionally, you have a choice regarding how to use the Emergency SOS function.
Do the following to complete your phone’s Emergency SOS setup:
- To proceed, select Start Setup under Record a video. This is an additional optional SOS function; select Skip if you do not want to use it.
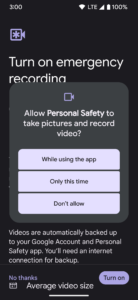
- When you’re ready, review the Turn on emergency recording page and click Turn on. Press No Thanks to turn this feature off if you do not want to use it.
- In the event that you activated the emergency video recording capability, select the video app permission that best suits your needs.
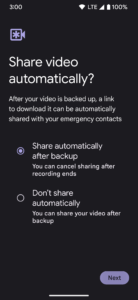
- On the next screen, choose either Don’t share automatically or Share automatically after backup.
- Press Next.
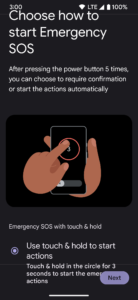
- Select the method to activate your phone’s Emergency SOS function. Choose either to initiate activities immediately after the countdown or Use touch and hold to initiate actions.
- To proceed, tap Next.
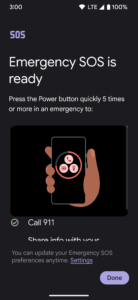
- When the Emergency SOS is ready to screen appears, tap Done.
- The main Emergency SOS page has been accessed once more.
- Your phone is now configured and prepared for usage with Emergency SOS. To view it in action, tap the Try a demo button located under the How it Works section.
When you need it, Satellite SOS is here to keep you safe.
If there is an emergency, traveling when cellular coverage sometimes drops off might be nerve-wracking. The point of safety features is negated if you are unable to contact emergency services or dial 911 in a crisis. But if your phone has the Satellite SOS option, it doesn’t have to be the case. It closes the gaps and makes it possible for everyone to remain linked everywhere they go. Your Pixel phone now has Satellite SOS, so you can utilize it in the event that you lose cellular service while traveling.

