Effective Strategies to Block Ads on Your Android Device

Websites and app creators often rely on ads to generate revenue and keep their services free or low-cost. However, excessive ads can be annoying, degrade user experience, drain battery life, and slow down even the best Android phones. Luckily, there are several ways to block or restrict ads on your Android tablet or phone. Read on to learn how.
Google Chrome: Block Pop-ups, Ads, and Redirects
Google Chrome has an integrated pop-up and ad blocker that can disable intrusive or deceptive ads. Here’s how to enable it on your phone:
- Open Google Chrome on your Android phone.
- Tap the three dots in the top-right corner to access Settings.
- Go to Site Settings.


4. In the “Content” section, select “Pop-ups and redirects.”
5. Disable the pop-ups and redirects toggle.
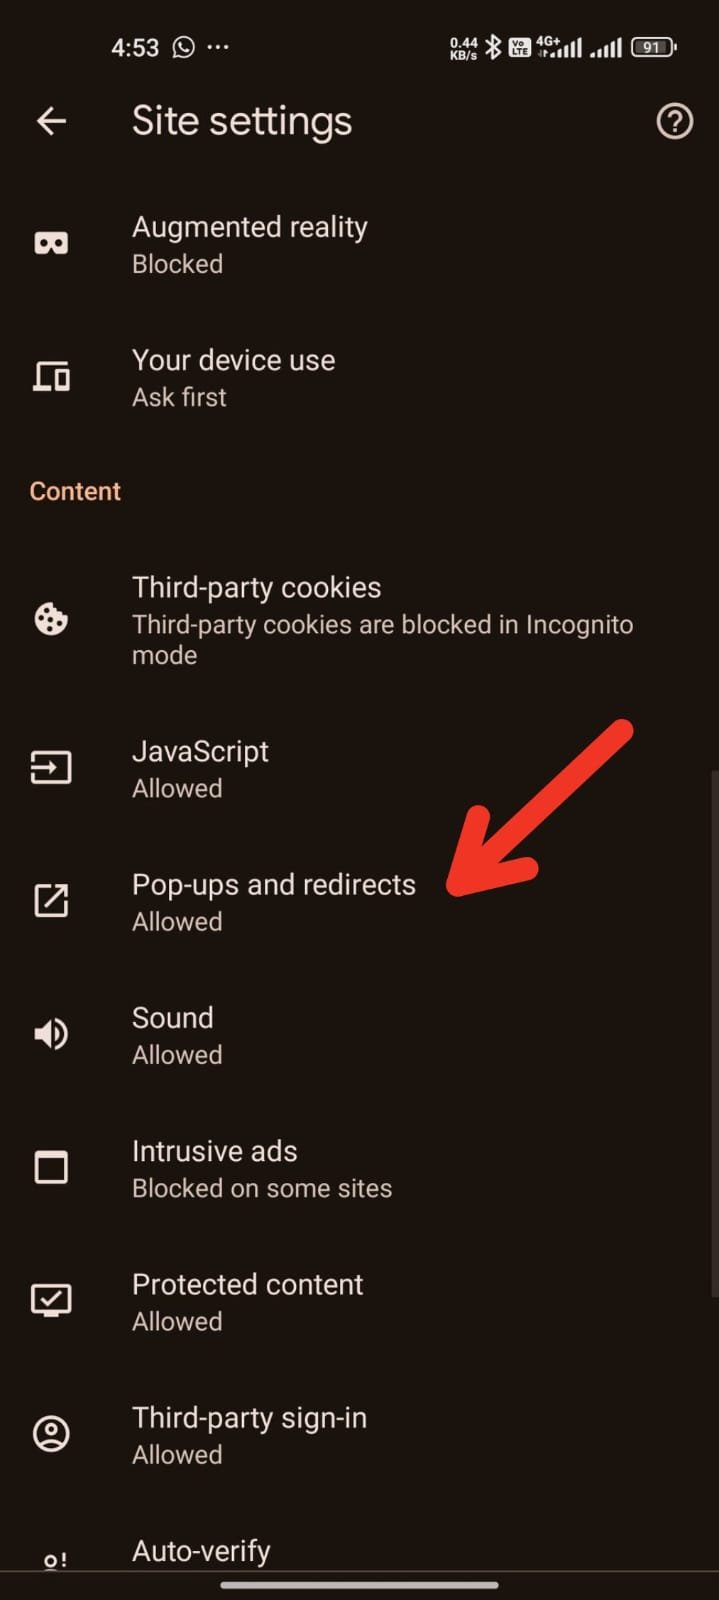

6. Return to the Site Settings page and choose “Intrusive ads.”
7. Toggle off intrusive ads.


Use a Third-party Web Browser
Chrome for mobile does not support ad-blocking extensions, but there are alternative browsers like Samsung Internet and Firefox that do. Samsung Internet has a built-in extension shop where you can download ad blockers. Another option is Brave, an ad-blocking browser that offers an ad-free browsing experience on Android.
Manage Notifications in Google Chrome
Allowing all websites to send real-time notifications can clutter your device’s notification center with irrelevant content. Here’s how to disable notifications from unwanted websites:
- Long-press the Google Chrome app icon and tap the “i” button.
- Open Notifications.


3. Go to “All Sites” notifications.
4. Review the list of permitted websites and their weekly notification count.
5. Disable notifications for any unfamiliar websites.

Block Ads on the Home Screen
Home screen ads are more intrusive than browser or notification ads. These full-screen banners can appear over any app. Some apps request permission to display content over other apps for legitimate reasons, like Facebook Messenger’s chat heads or Truecaller’s incoming call detection. However, some dubious apps misuse this permission to show ads. To disable this permission:
- Identify the app showing ads on the home screen.
- Long-press the app icon to access the app info menu.


3. Scroll down to “Display over other apps.”

4. Disable the toggle for this permission.
Use a DNS Provider to Block Ads
Using a DNS provider is one of the simplest ways to block ads across most websites. AdGuard offers two free ad-blocking DNS addresses: family.adguard-dns.com (filters adult content) and dns.adguard-dns.com (filters ads only). While using a DNS provider, websites may load more slowly, and you might see blank spaces where ads were blocked. To set up DNS ad blocking:
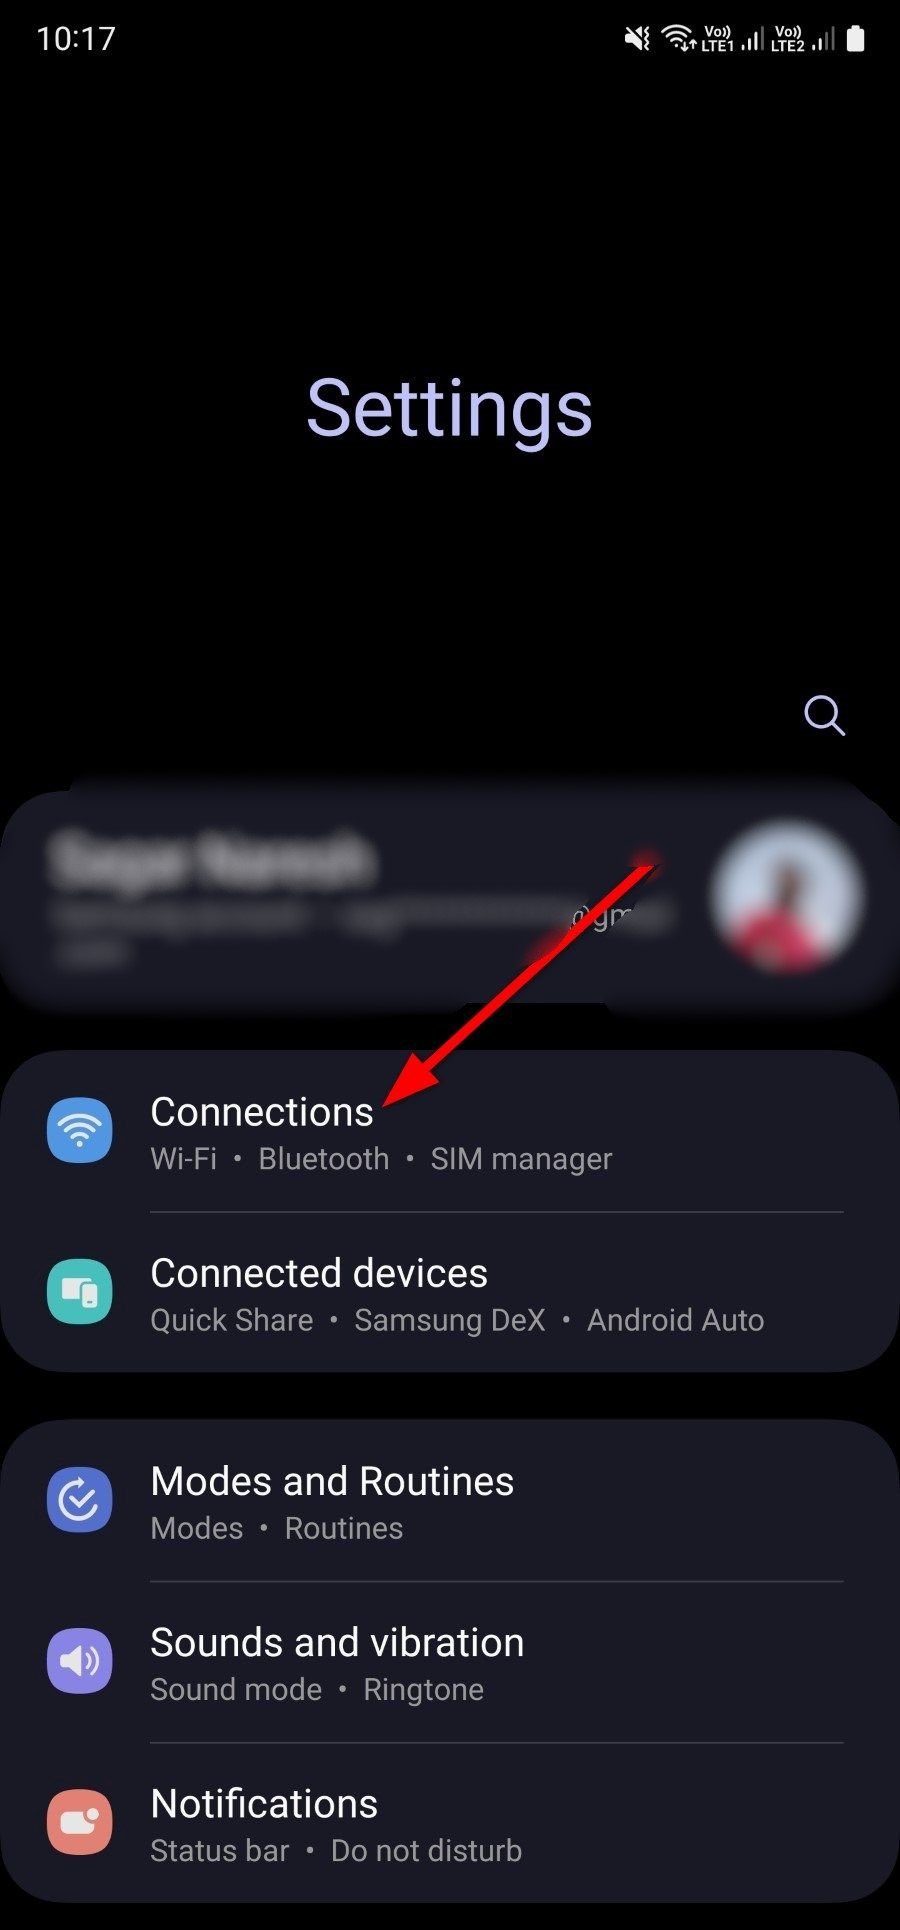
- Open the Settings app on your phone.
- Select Connections.
- Click on “More connection settings.”
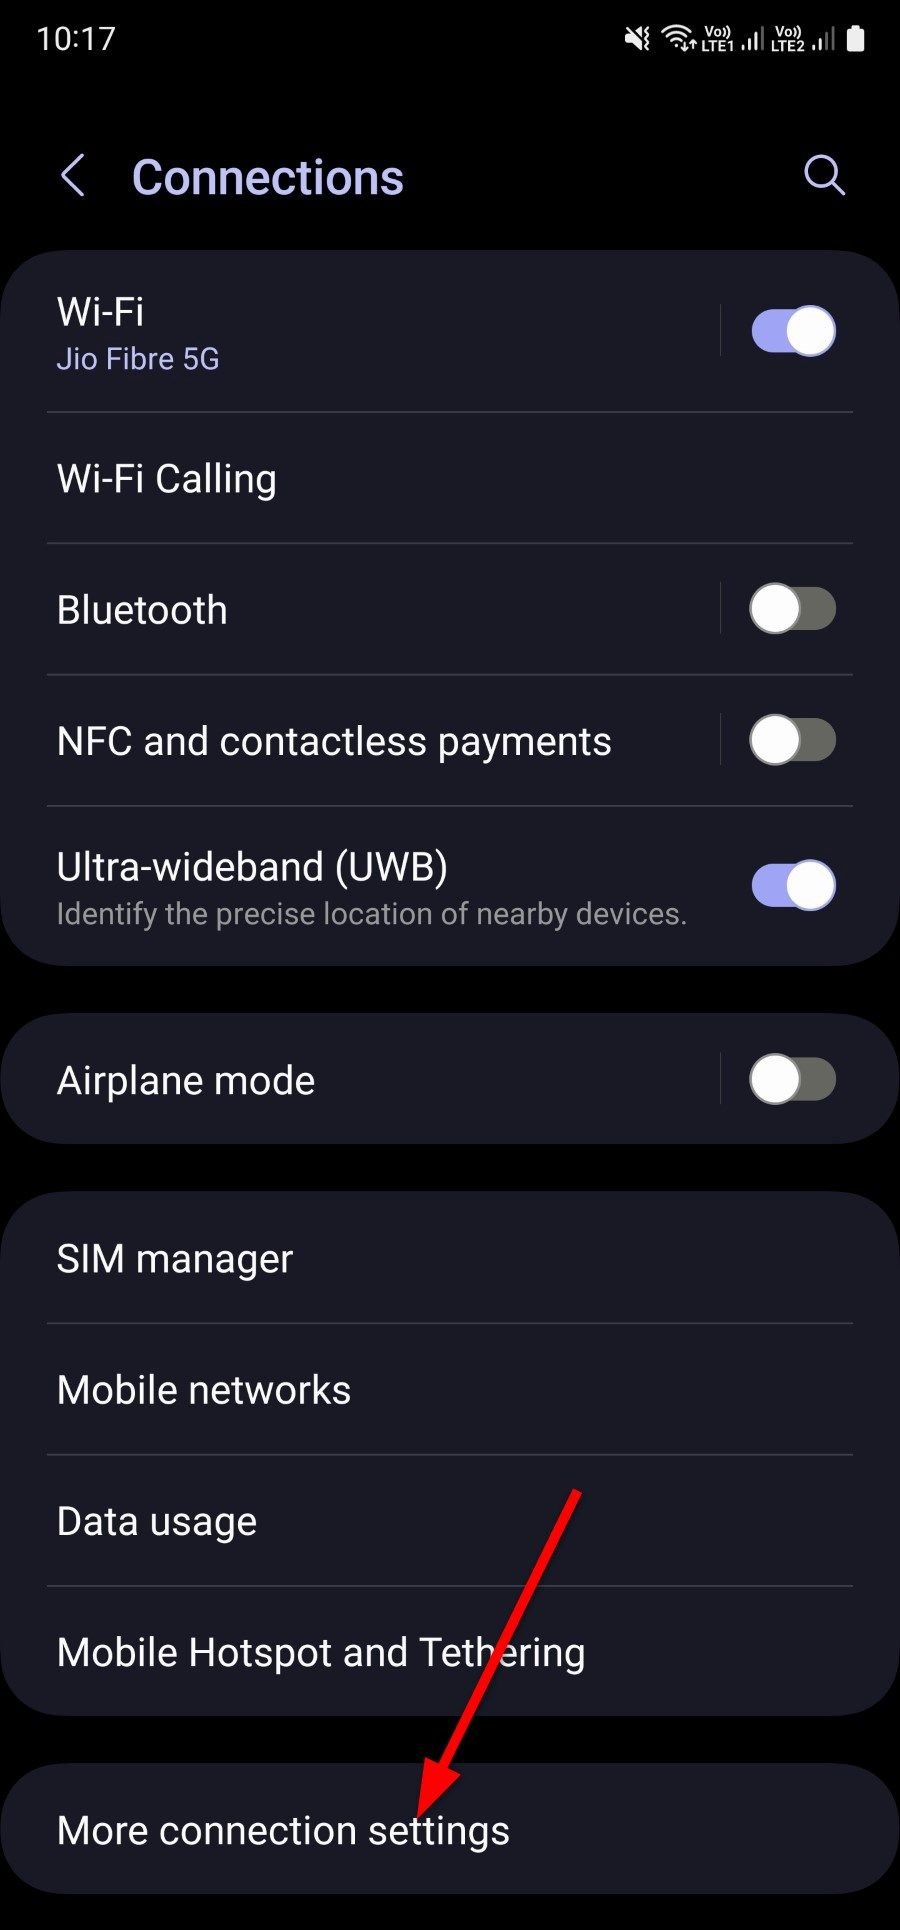
4. Go to Private DNS settings.
5. Choose “Private DNS provider hostname” and enter the desired DNS service, family.adguard-dns.com.
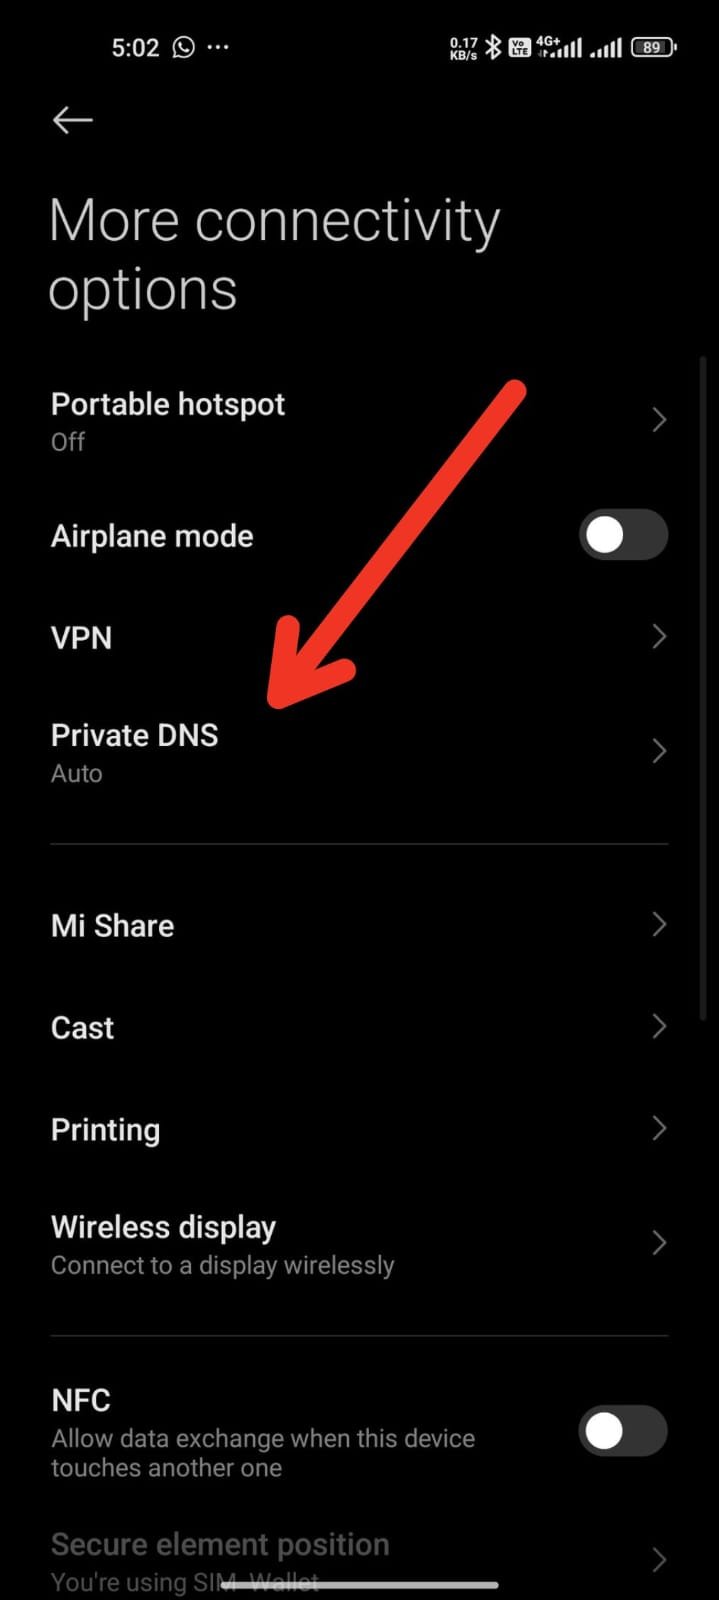

6. Tap Save to activate AdGuard.
Be Careful with App Installation
Avoid installing unnecessary torch apps, unofficial app launchers, and low-rated apps on your Android device. Antivirus apps are generally not needed. Check app reviews before installation; if many users complain about excessive ads, avoid those apps and find better alternatives.
Google’s Play Protect helps prevent harmful apps from being uploaded to the Play Store but doesn’t control ads in other apps. For more control, you can root your Android device and install a system-wide ad blocker, but be cautious as rooting can void your warranty and potentially brick your device if done incorrectly.
By following these steps, you can significantly reduce the number of ads you encounter on your Android phone or tablet, improving your overall user experience.